SSGs (Static Site Generator) like Hugo generates static HTML files without having to rely on databases and server-side processes. They have fast load times and can handle high traffic loads without the need for server management. I was looking for a website setup with minimal management, and decided to use Hugo as an SSG.
This isn’t a full tutorial but an overall breakdown of how my website is currently setup using Hugo as a static site generator, AWS S3 as a hosting platform, and Route 53 and CloudFlare for domain management.
Setup Steps:
Step 1. Domain from Route 53
I have my domain from AWS Route 53. I have no particular reason for choice here, except just having it configured with AWS domain service. It costs $13 per year plus some small fees for taxes.
Nameservers are then rerouted to Cloudflare for DNS management, SSL, and caching configuration. Cloudflare will provide the nameservers for the rerouting, to have it updated on Route 53. It should take a few hours for domain propagation to complete.
Step 2. S3 Buckets Setup
The next step was to create two S3 buckets to host static content of the website:
(I). an S3 bucket configured for murphyelo.com, and configured for public access to objects in the bucket. Here is the bucket policy to allow public access to objects:
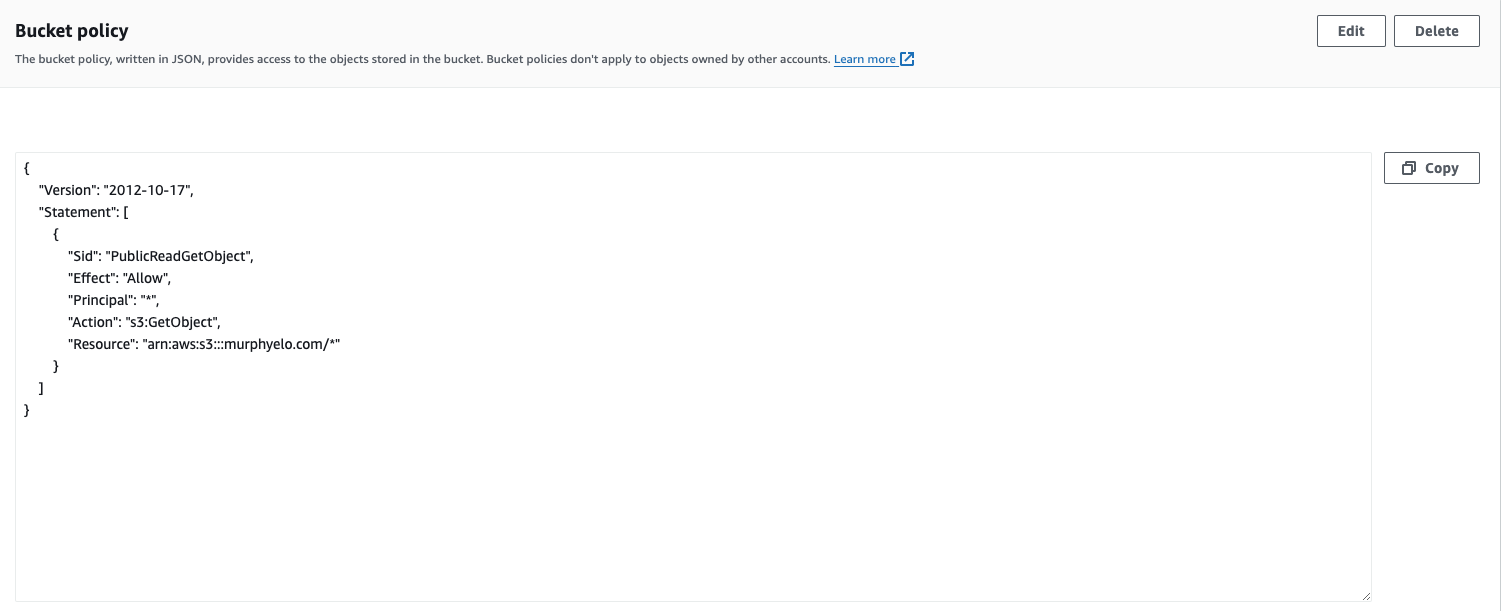
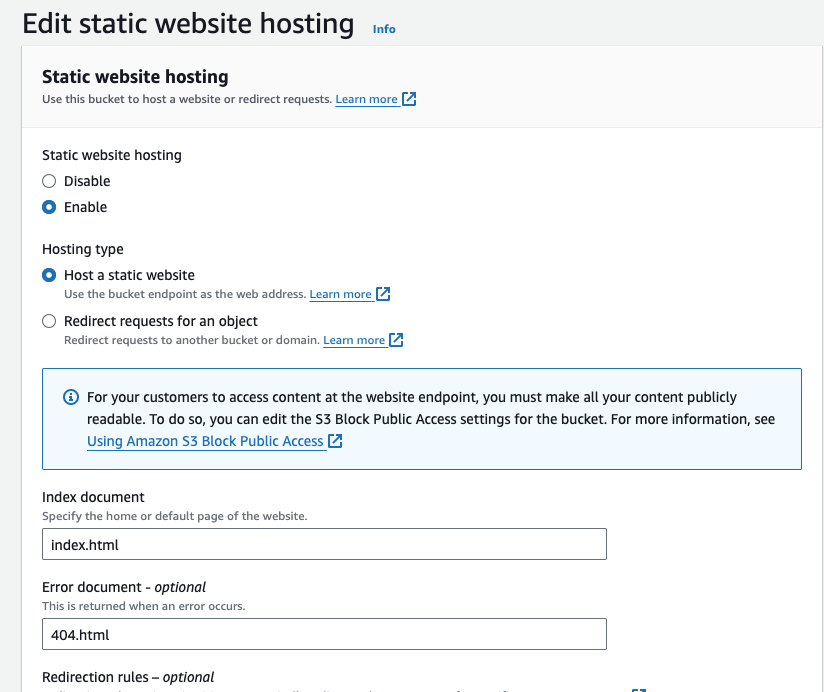
Also, static website hosting has to be enabled under the “Properties” tab, and “Index document” set to index.html and the “Error document” to error.html (I used 404.html as error document)
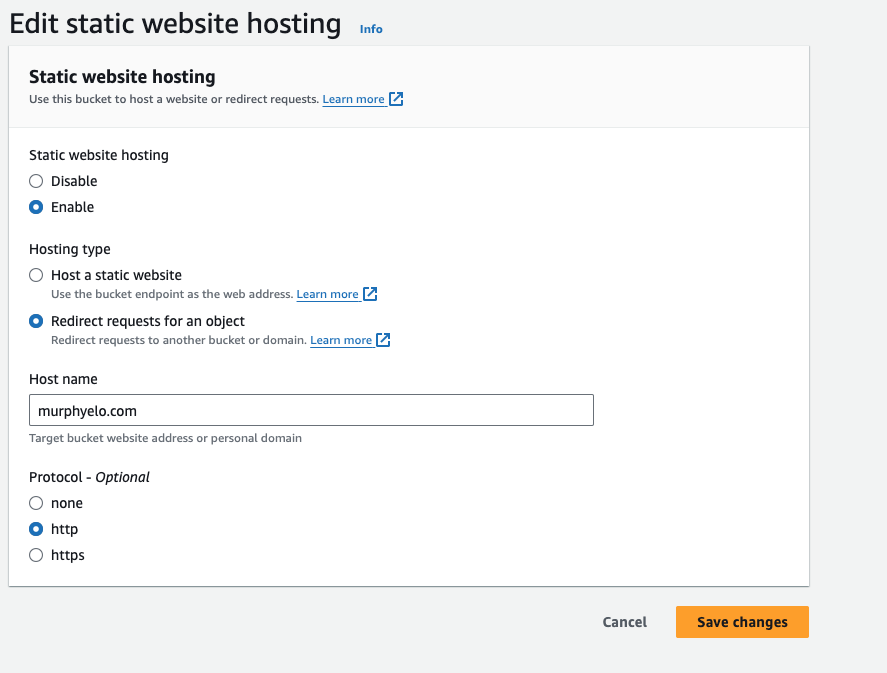
(II). another bucket configured for static hosting, but redirects all requests to the “main” bucket www.murphyelo.com. This will ensure anyone accessing the website through www.murphyelo.com will get redirected to murphyelo.com. Make sure hosting type for this bucket is set to “Redirect requests for an object”.
After these setups, go on CloudFlare to create an A record pointing to the endpoint of the main bucket.
Step 3. Hugo Setup
The next step was to build website locally with Hugo. If you’re on macOS, you can have hugo installed through Homebrew. Here is a link to the documentation - https://gohugo.io/installation/.
Website structure uses the PaperMod theme with custom customization done with basic HTML and CSS. Here is a link to the PaperMod’s repo - https://github.com/adityatelange/hugo-PaperMod.
Use the following command to add the theme to local build:
cd my-website
git init
git submodule add https://github.com/adityatelange/hugo-PaperMod themes/PaperMod
Then edit the hugo.toml file to include the theme:
theme = "PaperMod"
Test locally to see that everything is working and to your desired results.
Step 4. Deploy to S3
To deploy to S3, you will first do a Hugo build with the hugo command and then deploy with the following command:
aws s3 sync public/ s3://name-of-bucket --delete
Make sure you first have AWS CLI installed and configured to read access to the S3 buckets.
I’d recommend cleaning up previous builds that would delete the public directory before deploying to avoid any residual files that can cause caching issues. So this will be done in the order of:
rm -rf public
hugo
aws s3 sync public/ s3://name-of-bucket --delete
Step 5. Setup for Domain
This is optional, but if you’re looking into setting up a subdomain for a new Hugo site, you will need to create another bucket and configure it for static website hosting, similar to the main bucket.
Then on CloudFlare, simply create a CNAME record for the subdomain with the bucket endpoint as the target.
Step 5. Future Plans
-
I have both websites (main and subdomain), pushed to GitHub individually, mainly for backup purposes. Currently, whenever I make content and do a deployment, I make a commit to Github. In the future, I will be looking into setting up CD with GitHub Actions workflow to automatically deploy to S3 every time a push is made to the master branch.
-
I might look into using Grunt as a task runner to minify images before publishing them.
That’s it folks, I hope this helps.