Setting up AWS S3 for Image Storage
This tutorial will walk you through how AWS S3 bucket was configured for the Rice Leaf Disease Detection application.
Prerequisites
- An AWS account with administrative access, preferably an IAM user with the necessary permissions.
- AWS CLI installed (optional but recommended)
- Have the repo cloned and the application running locally - Rice Disease Detection
The following key requirements were considered when setting up the S3 bucket:
- Public Access Control: Images should not be publicly accessible to prevent unauthorized use.
- Pre-Signed URLs: Users should be able to upload images without authentication, using presigned-url .
- Encryption: Images should be encrypted at rest using server-side encryption .
- Lifecycle Policies: Images should be deleted automatically after 30 days to save storage costs.
Step 1: Create an S3 Bucket
- Log in to the AWS Management Console
- Navigate to S3 service
- Click “Create bucket”
- Configure the bucket:
- Enter a unique bucket name (e.g:
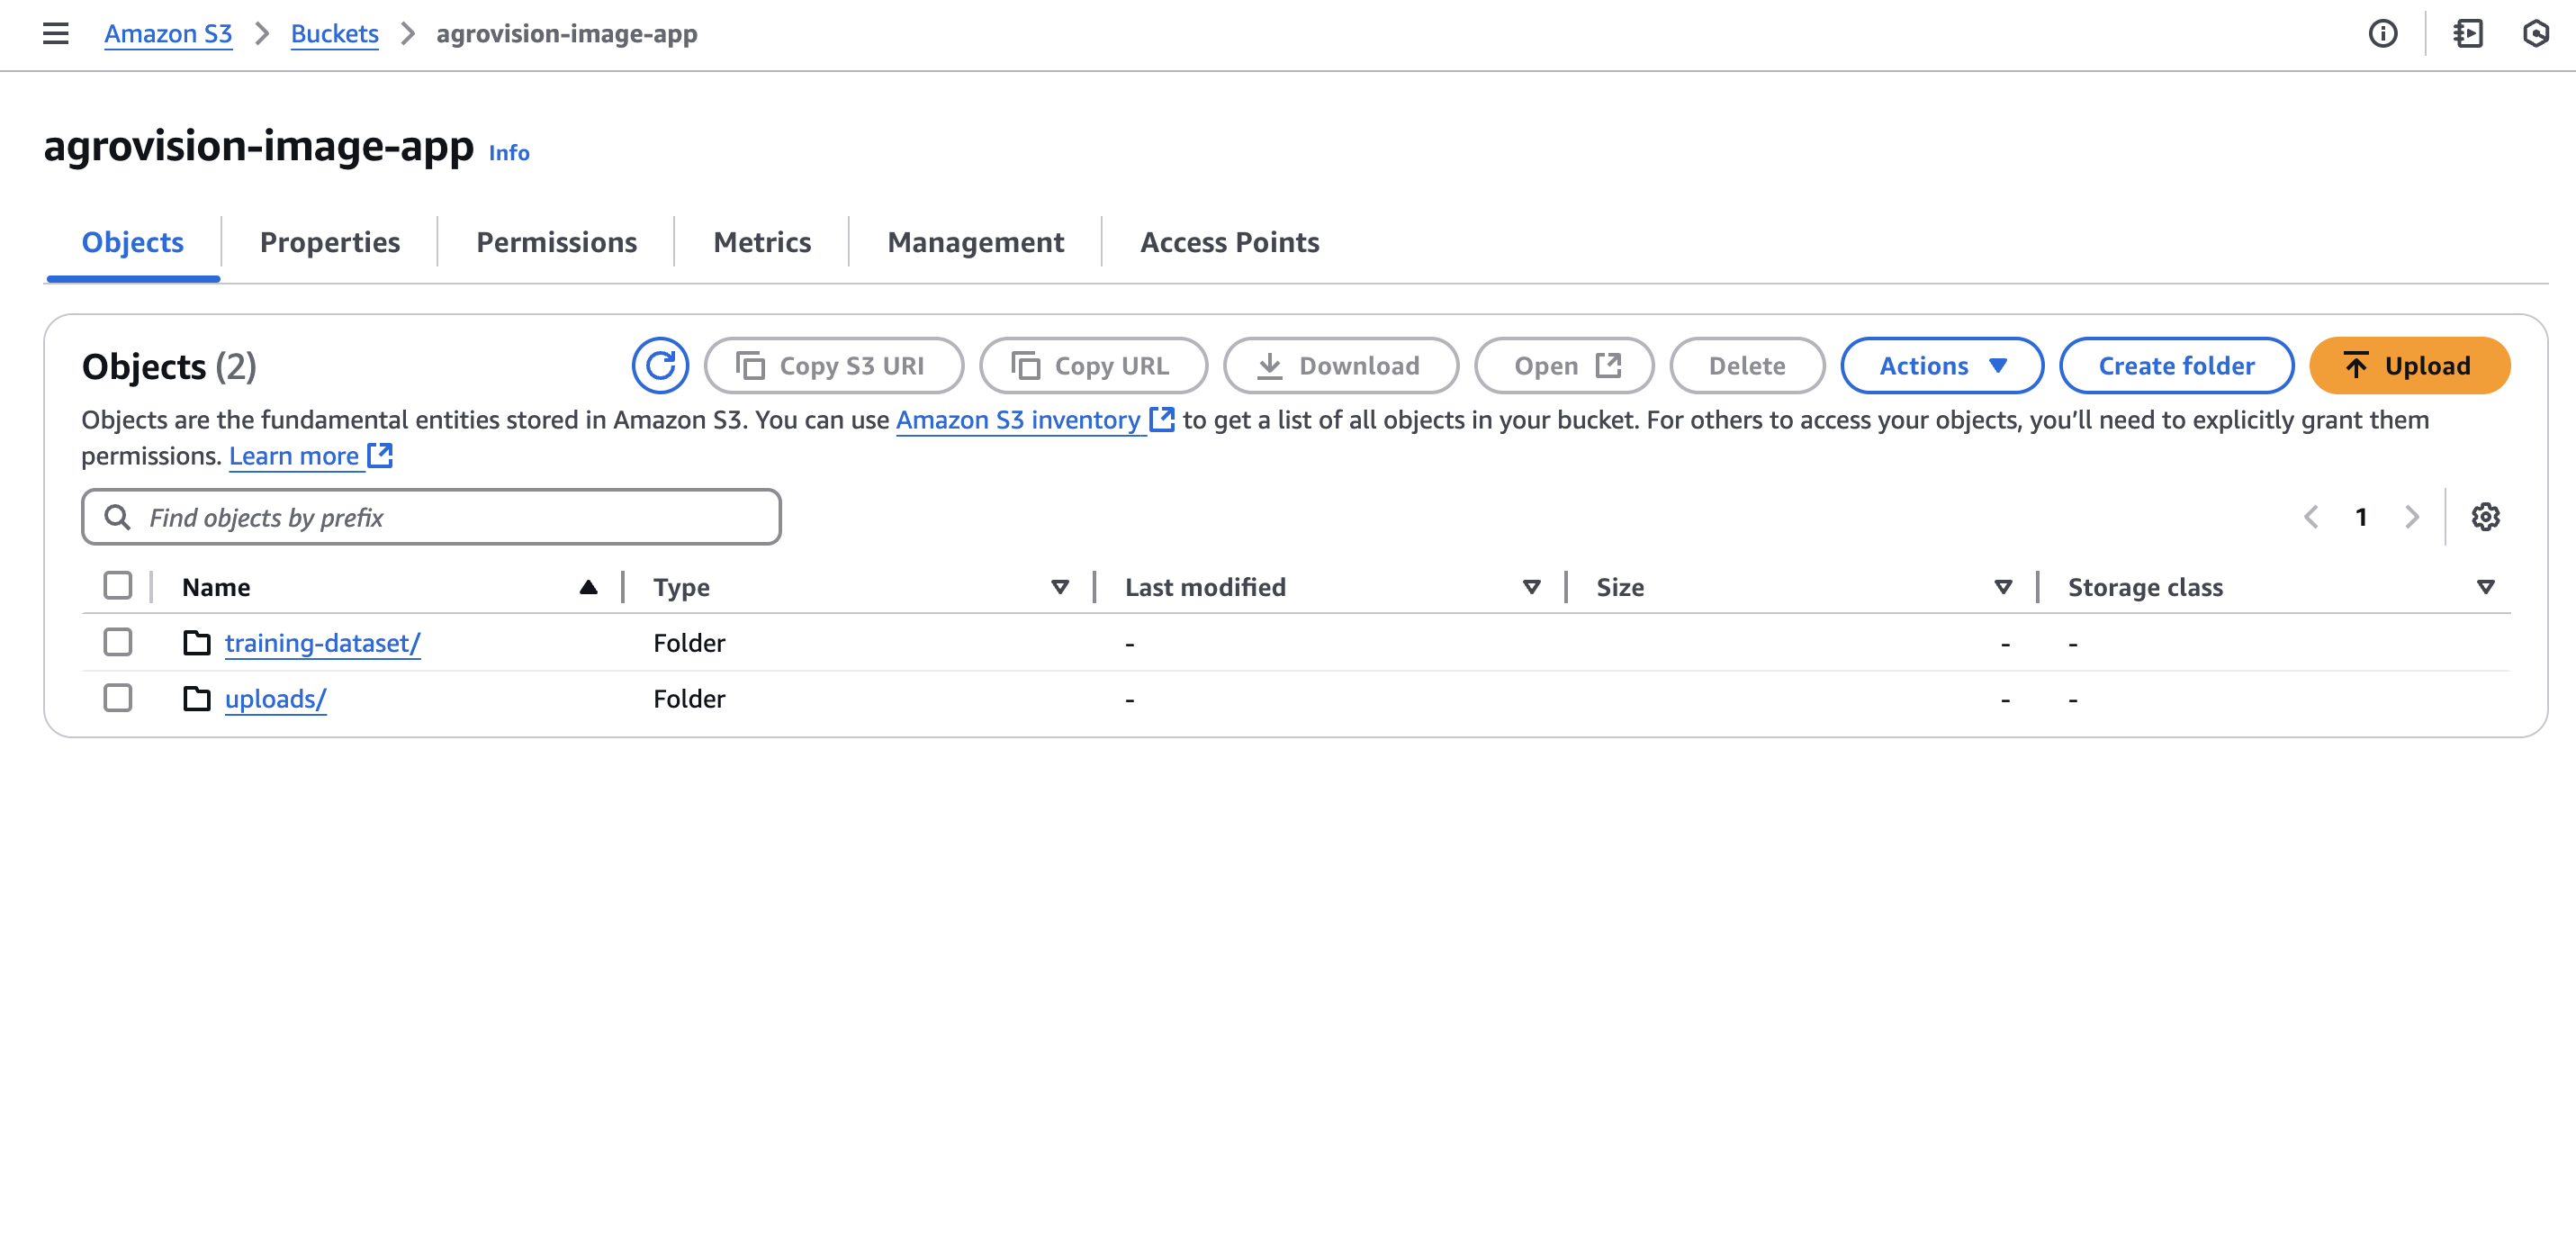
agrovision-image-app) - Region:
eu-west-1or preferred region - Block all public access (enabled by default)
- Click “Create bucket”
- Enter a unique bucket name (e.g:
- Create a folder named
uploadsin the bucket - this is where the uploaded images will be stored.
Step 2: Configure CORS Policy
The bucket needs a CORS (Cross-Origin Resource Sharing) policy to allow uploads to s3 via presigned-url from localhost and production domain(Amplify to be configured in later articles).
- Select your newly created bucket
- Go to the “Permissions” tab
- Scroll down to “Cross-origin resource sharing (CORS)”
- Click “Edit” and add the following CORS configuration:
[
    {
        "AllowedHeaders": [
            "*"
        ],
        "AllowedMethods": [
            "GET",
            "PUT",
            "POST",
            "DELETE"
        ],
        "AllowedOrigins": [
            "http://localhost:3000",
            "https://main.d3kisosltzp7u9.amplifyapp.com"
        ],
        "ExposeHeaders": [
            "ETag"
        ]
    }
]
Step 3: Uploading images with presigned-url
As mentioned in the key requirements, pre-signed URLs allow the frontend to securely upload files to S3 without exposing AWS credentials. In our /api/upload endpoint, we generate a unique file key using crypto.randomUUID() and attach it with an uploads/ prefix. The generated pre-signed URL is valid for a short duration (3600 seconds).
Here is the code snippet from the /api/upload/route.ts file:
const fileExtension = filename.split('.').pop()
const uniqueFileName = `uploads/${crypto.randomUUID()}.${fileExtension}`

    const { url, fields } = await createPresignedPost(s3Client, {
      Bucket: process.env.S3_BUCKET_NAME!,
      Key: uniqueFileName,
      Conditions: [
        ['content-length-range', 0, 10485760], // up to 10 MB
        ['starts-with', '$Content-Type', 'image/'],
      ],
      Fields: {
        'Content-Type': contentType,
      },
      Expires: 3600,
    })
Step 4: Bucket Lifecycle Rules
To manage storage costs, we set up lifecycle rules for images to be deleted after 30 days using AWS CLI command:
aws s3api put-bucket-lifecycle-configuration --bucket agrovision-image-app --lifecycle-configuration '{
  "Rules": [{
    "ID": "AutoDeleteOldImages",
    "Status": "Enabled",
    "Prefix": "",
    "Expiration": {"Days": 30}
  }]
}'
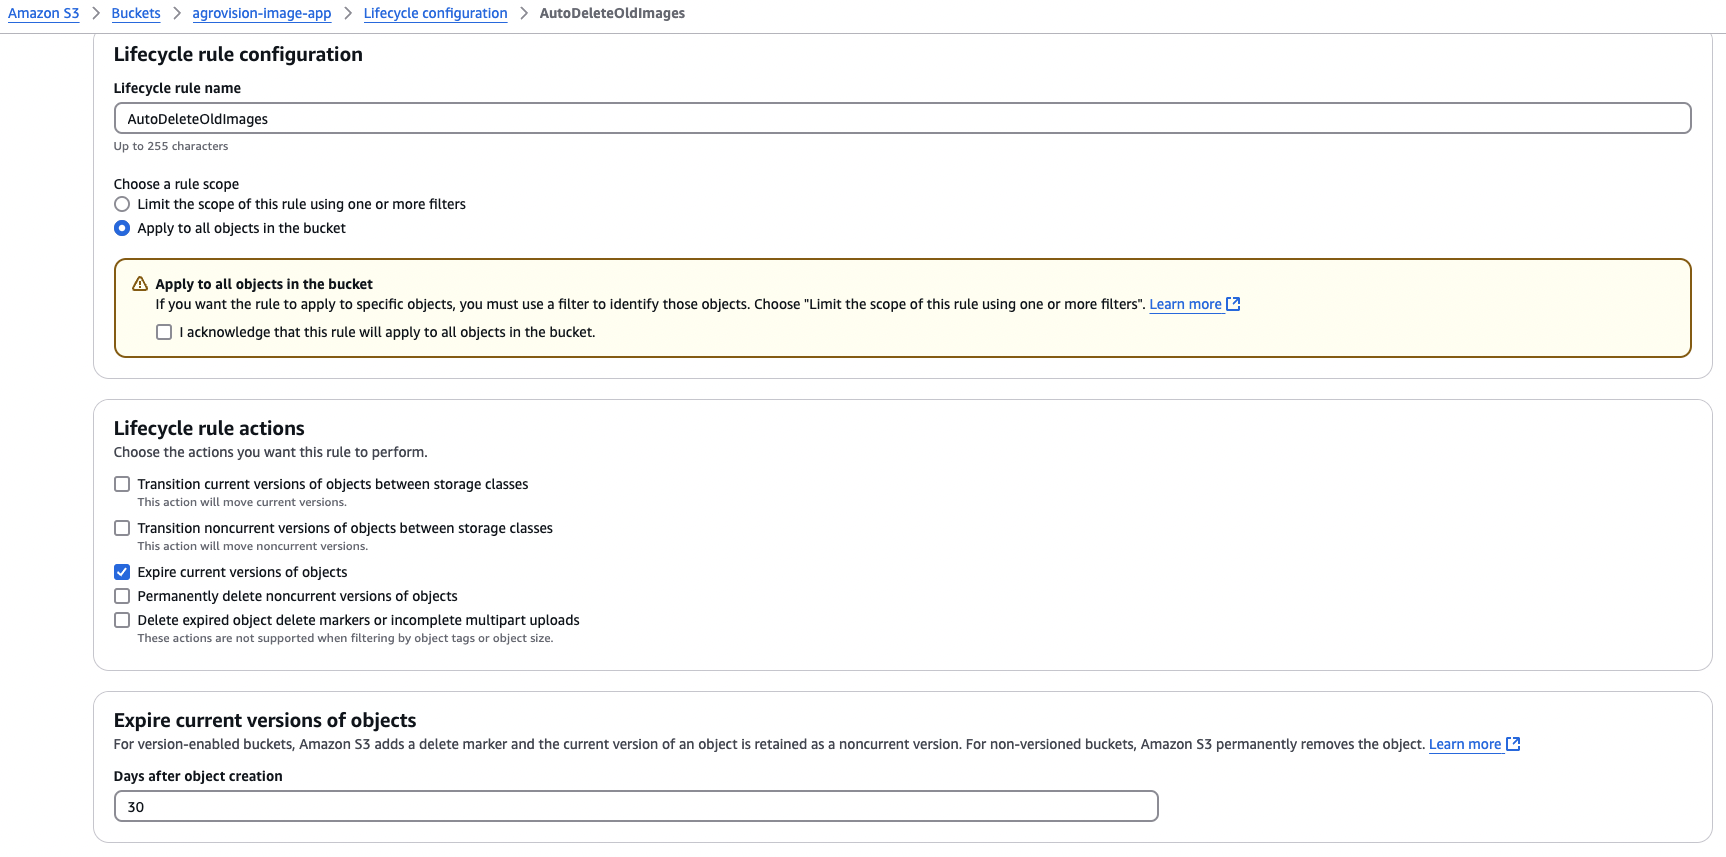
Here is how to do same using AWS Console:
- Go to S3 service
- Select the bucket you want to configure
- Go to the “Management” tab
- Click “Create lifecycle rule”
- Configure the rule as follows:
- Name:
AutoDeleteOldImages - Prefix:
uploads/ - Expiration:
30 days - Status:
Enabled
- Name:
- Click “Create”

Setting up AWS DynamoDB
-
Go to DynamoDB service
-
Click “Create table”
-
Configure the table:
- Table name:
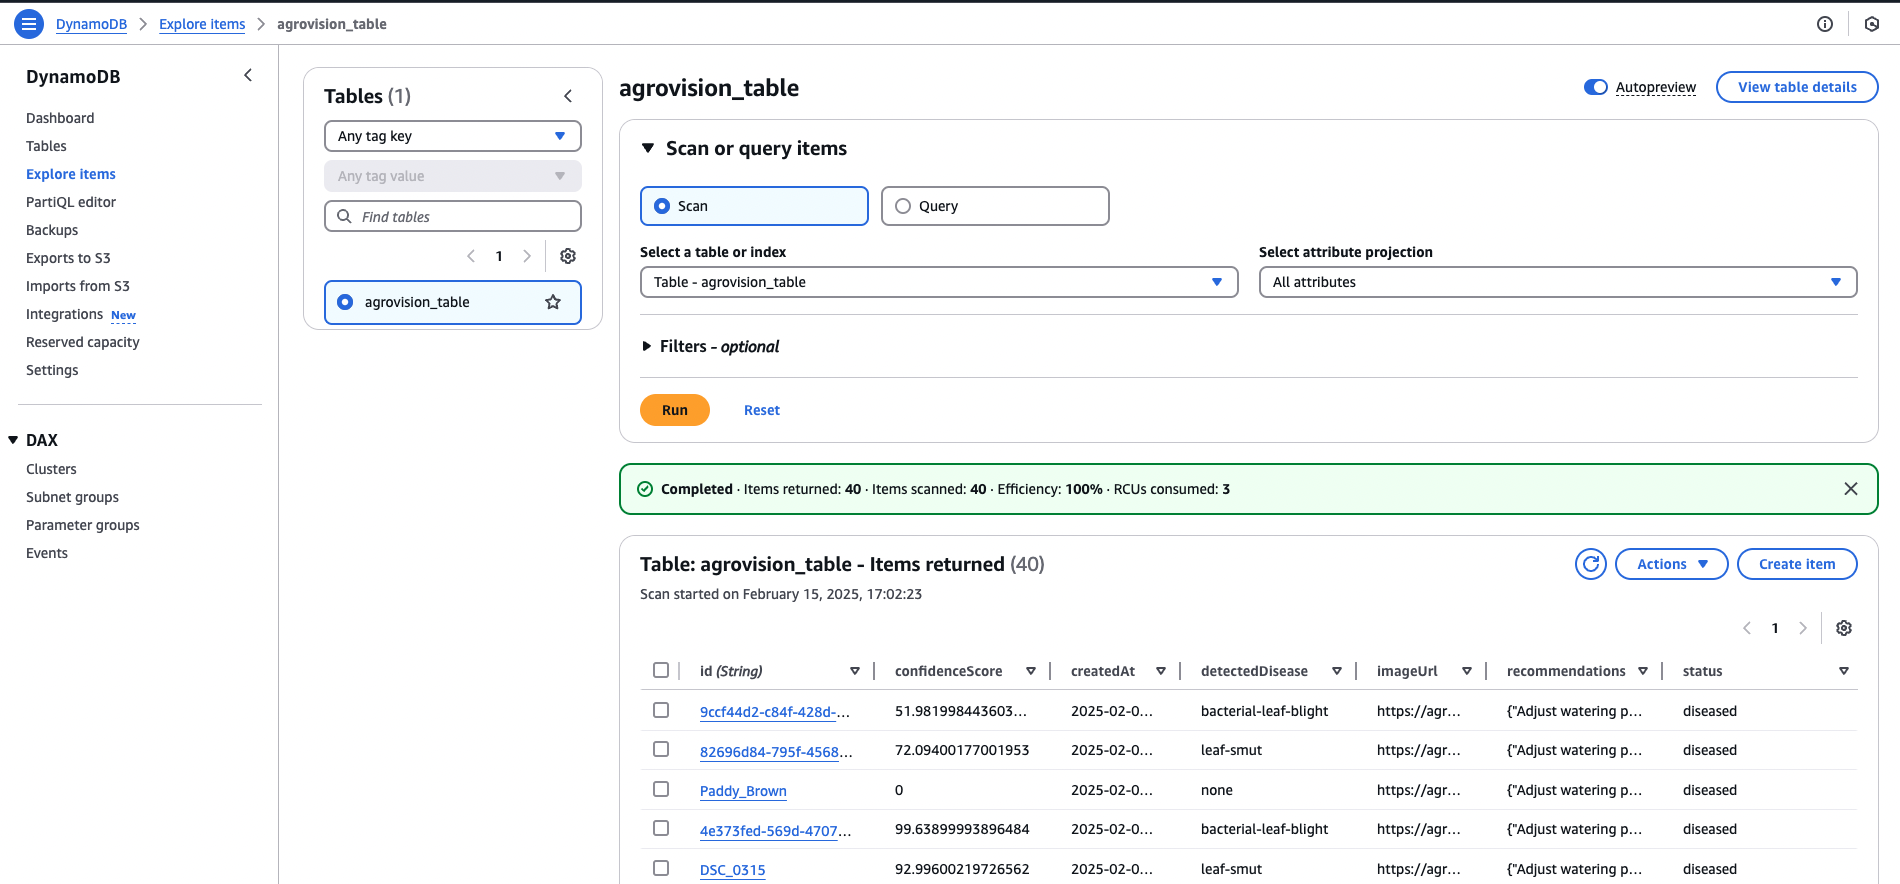
agrovision_table - Partition key:
id(String) - Leave Sort key as optional
- Leave Table settings as default
- Click “Create table”
- Table name:
These are the attributes stored in the table:
- id: Unique identifier for the image generated during the S3 upload.
- detectedDisease: Disease detected by Rekognition (e.g., bacterial-leaf-blight).
- confidenceScore: Confidence percentage from the model.
- imageUrl: URL of the uploaded image in S3.
- createdAt: Timestamp of when the analysis was performed.
- recommendations: Array of actionable recommendations.

Our API route /api/analyze uses the DynamoDB Document Client to query and retrieve the analysis result:
// Poll DynamoDB for results
    let attempts = 0
    const maxAttempts = 20 // Increased attempts
    const pollInterval = 3000 // 3 seconds

    while (attempts < maxAttempts) {
      const result = await docClient.get({
        TableName: process.env.DYNAMODB_TABLE_NAME!,
        Key: {
          id: imageId
        }
      })
Challenges encountered
-
Challenge 1: Image ID Mismatch
- Problem: The image uploaded from the frontend is renamed with a unique ID by S3, causing a mismatch if the frontend still uses the original filename.
- Solution: Updated the /api/upload endpoint to return the new unique file ID. The frontend then updates its state to use this ID for subsequent API calls.
-
Challenge 2: CORS Issues
- Problem: during production, requests from the Amplify-hosted app to the S3 bucket were being blocked due to CORS policies.
- Solution: Configured the S3 bucket’s CORS policy to allow specific origins (both Amplify url and local development).
-
Challenge 3: Polling for Analysis Results
- Problem: The frontend timed out waiting for analysis results that already been processed and stored in DynamoDB.
- Solution: Implemented a polling mechanism in the API route with appropriate retry intervals and logs to debug whether the correct image ID is used and results are fetched from DynamoDB.
Refer to other tutorials in this series for setting up additional AWS services like Lambda, Rekognition, and Amplify to host the frontend.
