Deploying the Rice Disease Detection App with AWS Amplify
This guide explains how to deploy our Next.js application using AWS Amplify. AWS Amplify provides a git-based workflow for hosting full-stack serverless web applications with continuous deployment.
Prerequisites
Before starting the deployment process, ensure you have:
- A GitHub repository with your application code pushed to it
- AWS account with administrative access
Step 1: Connect Your Repository
- Navigate to AWS Amplify Console
- Click “Create new app”
- Choose GitHub as your repository source
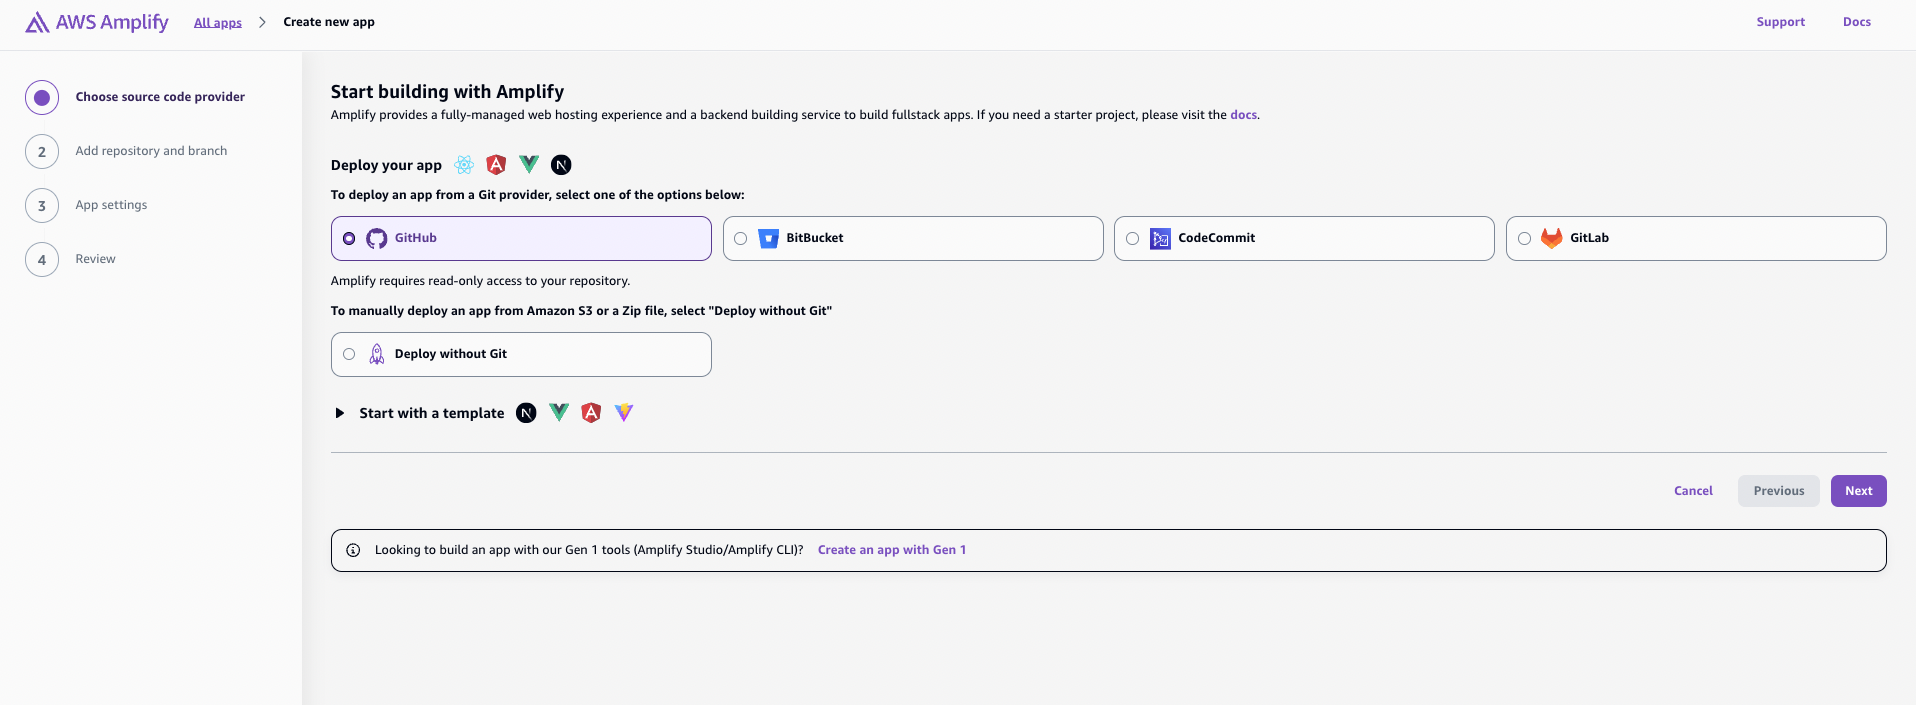
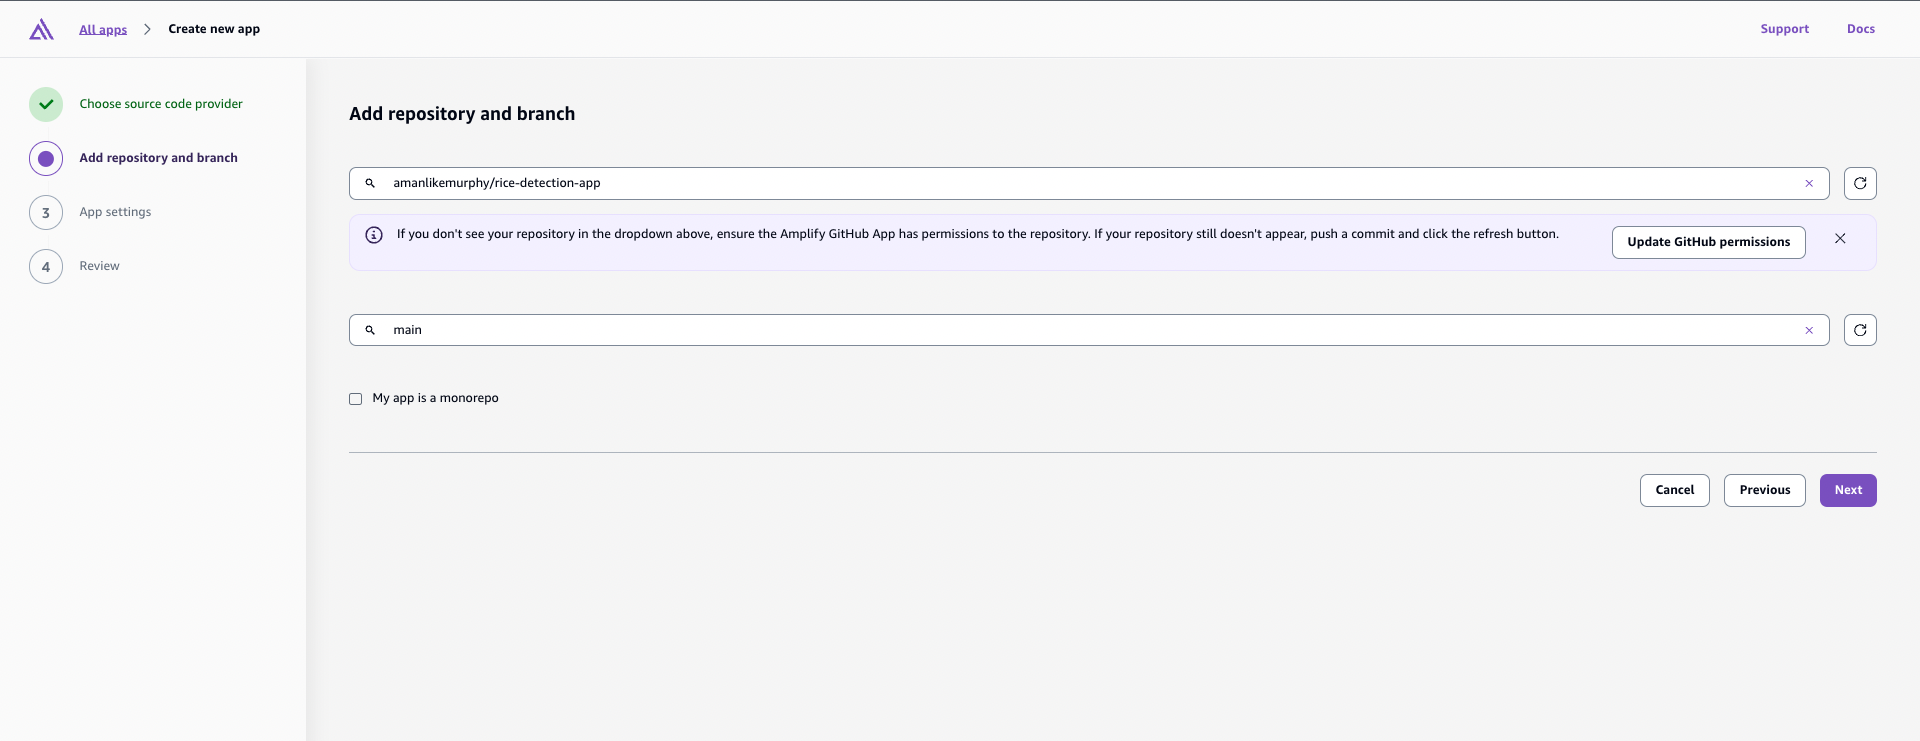
- Authenticate with GitHub and select your repository and branch
- For service role, you can select to use an existing role or create a new one. I created a new one.
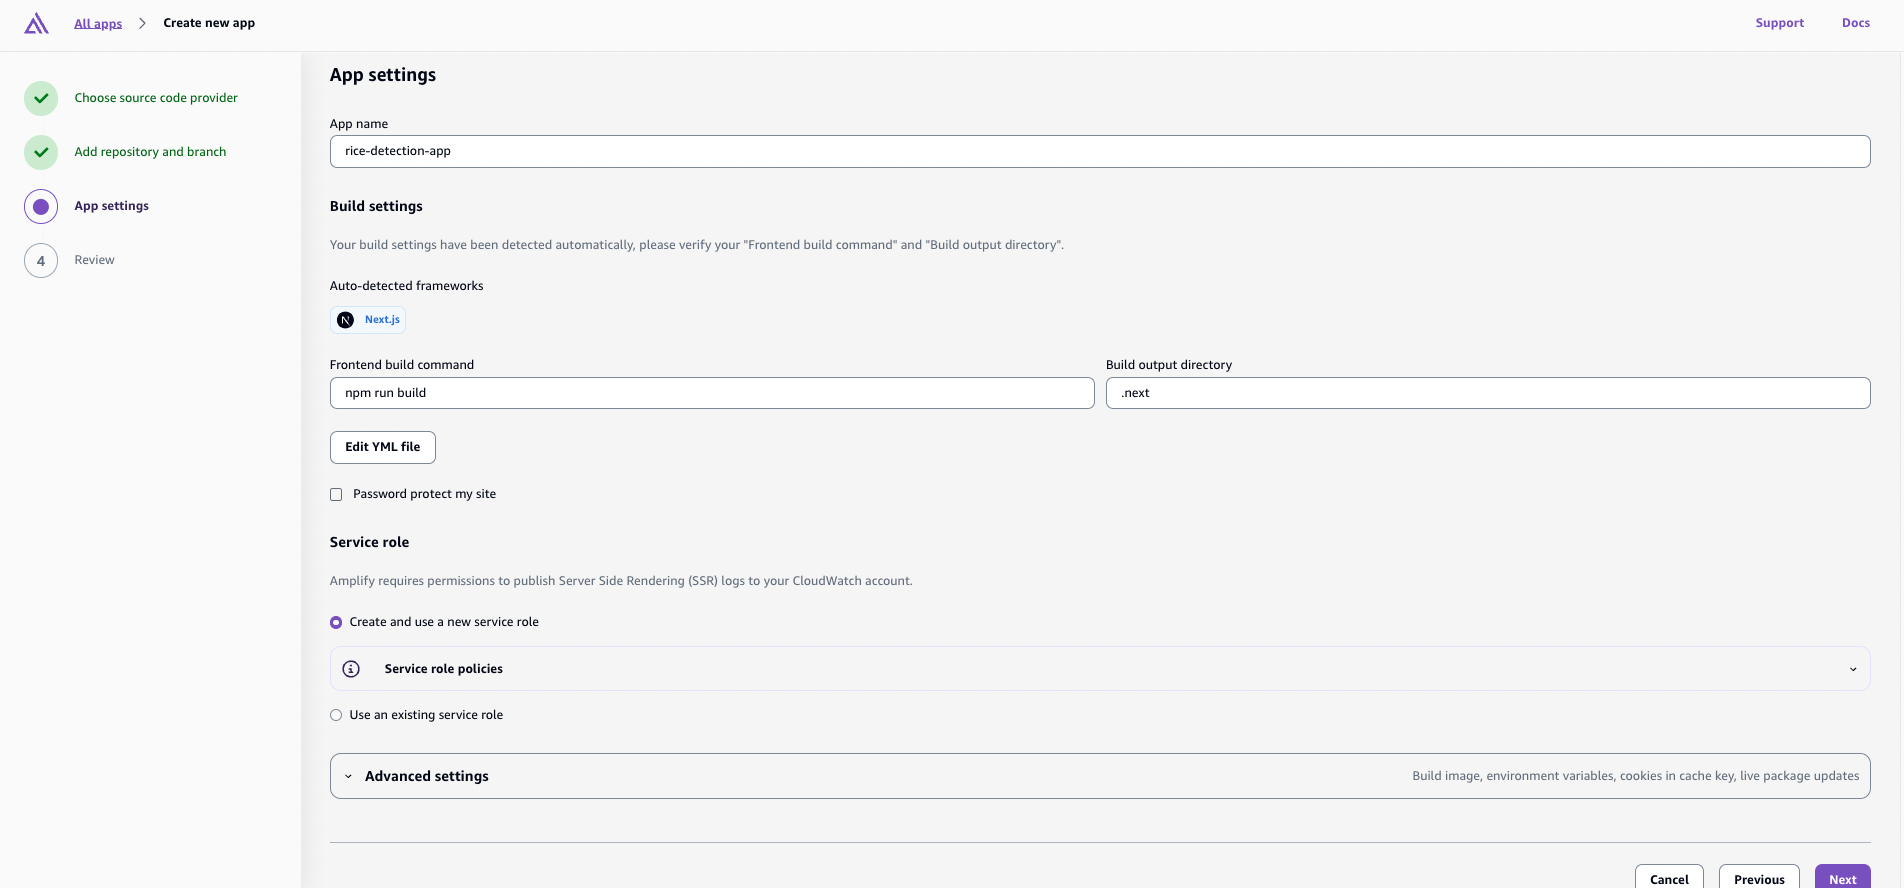
- Click “Deploy”
This will automatically fail because we need to configure the build settings.
Step 2: Configure Build Settings
Amplify needs the build specification YML file to control how the app build will run and is stored on servers. This is the amplify.yml file used:
version: 1
frontend:
  phases:
    preBuild:
      commands:
        - npm ci --cache .npm --prefer-offline
    build:
      commands:
        - 'echo "REGION=$REGION" >> .env'
        - 'echo "ACCESS_KEY_ID=$ACCESS_KEY_ID" >> .env'
        - 'echo "SECRET_ACCESS_KEY=$SECRET_ACCESS_KEY" >> .env'
        - 'echo "S3_BUCKET_NAME=$S3_BUCKET_NAME" >> .env'
        - 'echo "DYNAMODB_TABLE_NAME=$DYNAMODB_TABLE_NAME" >> .env'
        - 'echo "MODEL_ARN=$MODEL_ARN" >> .env'
        - npm run build
  artifacts:
    baseDirectory: .next
    files:
      - '**/*'
  cache:
    paths:
      - .next/cache/**/*
      - .npm/**/*
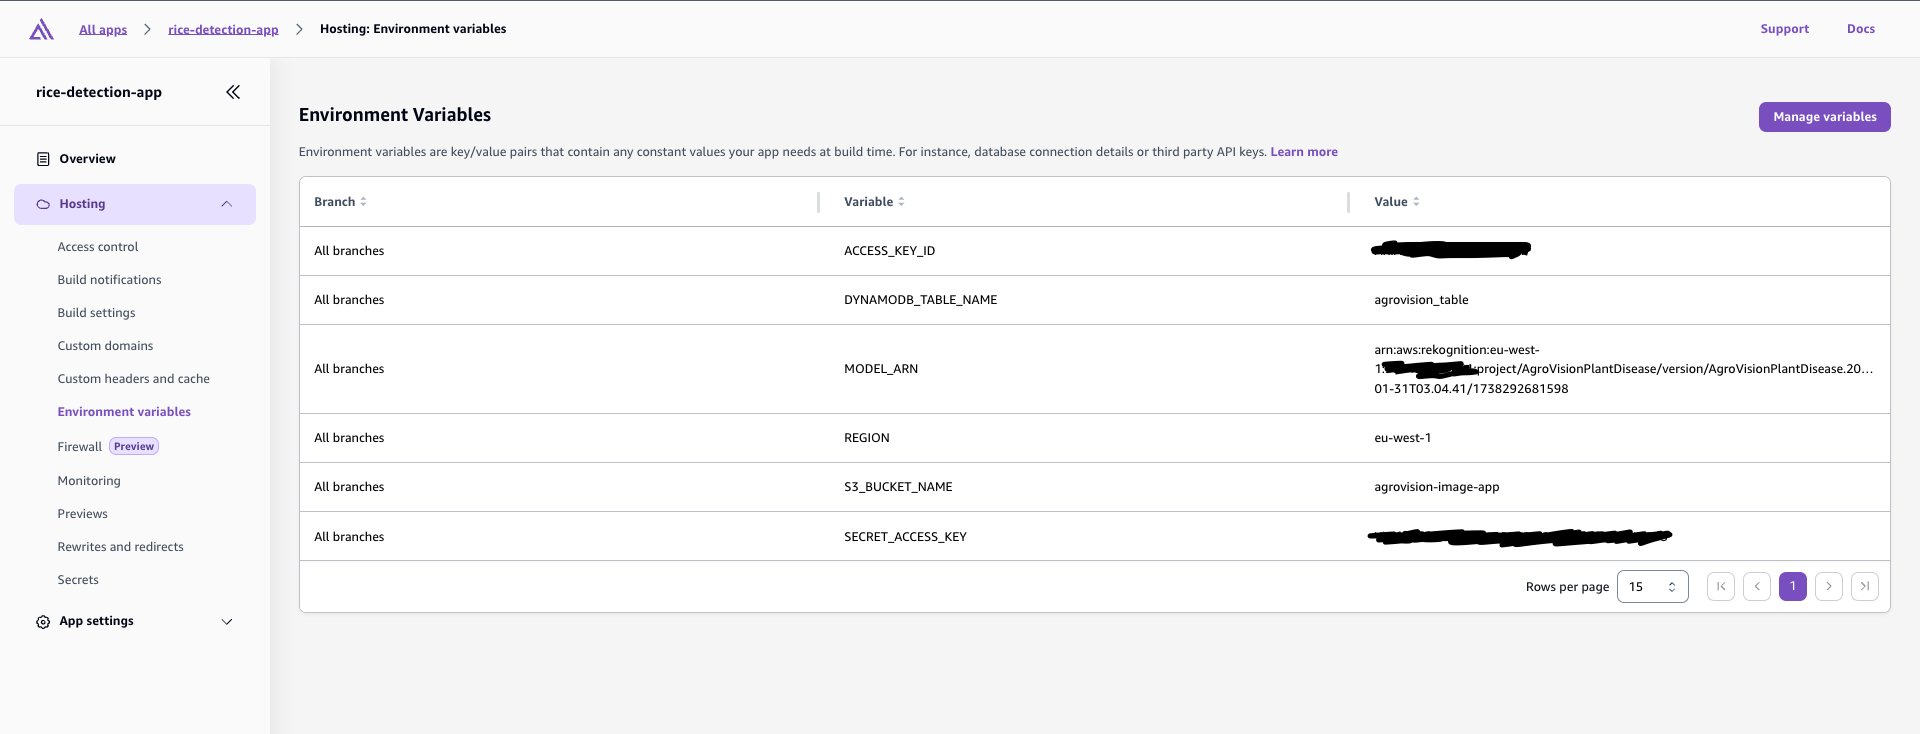
Step 3: Environment Variables
Add your environment variables in the Amplify Console:
- Go to Overview → Environment variables
- Add the following variables:
ACCESS_KEY_ID=your_access_key
SECRET_ACCESS_KEY=your_secret_key
REGION=your_region
S3_BUCKET_NAME=your_bucket_name
DYNAMODB_TABLE_NAME=your_table_name
MODEL_ARN=your_model_arn
Step 4: Deploy
- Go to the ‘Overview’ tab in the Amplify Console
- Click ‘Deploy this version’
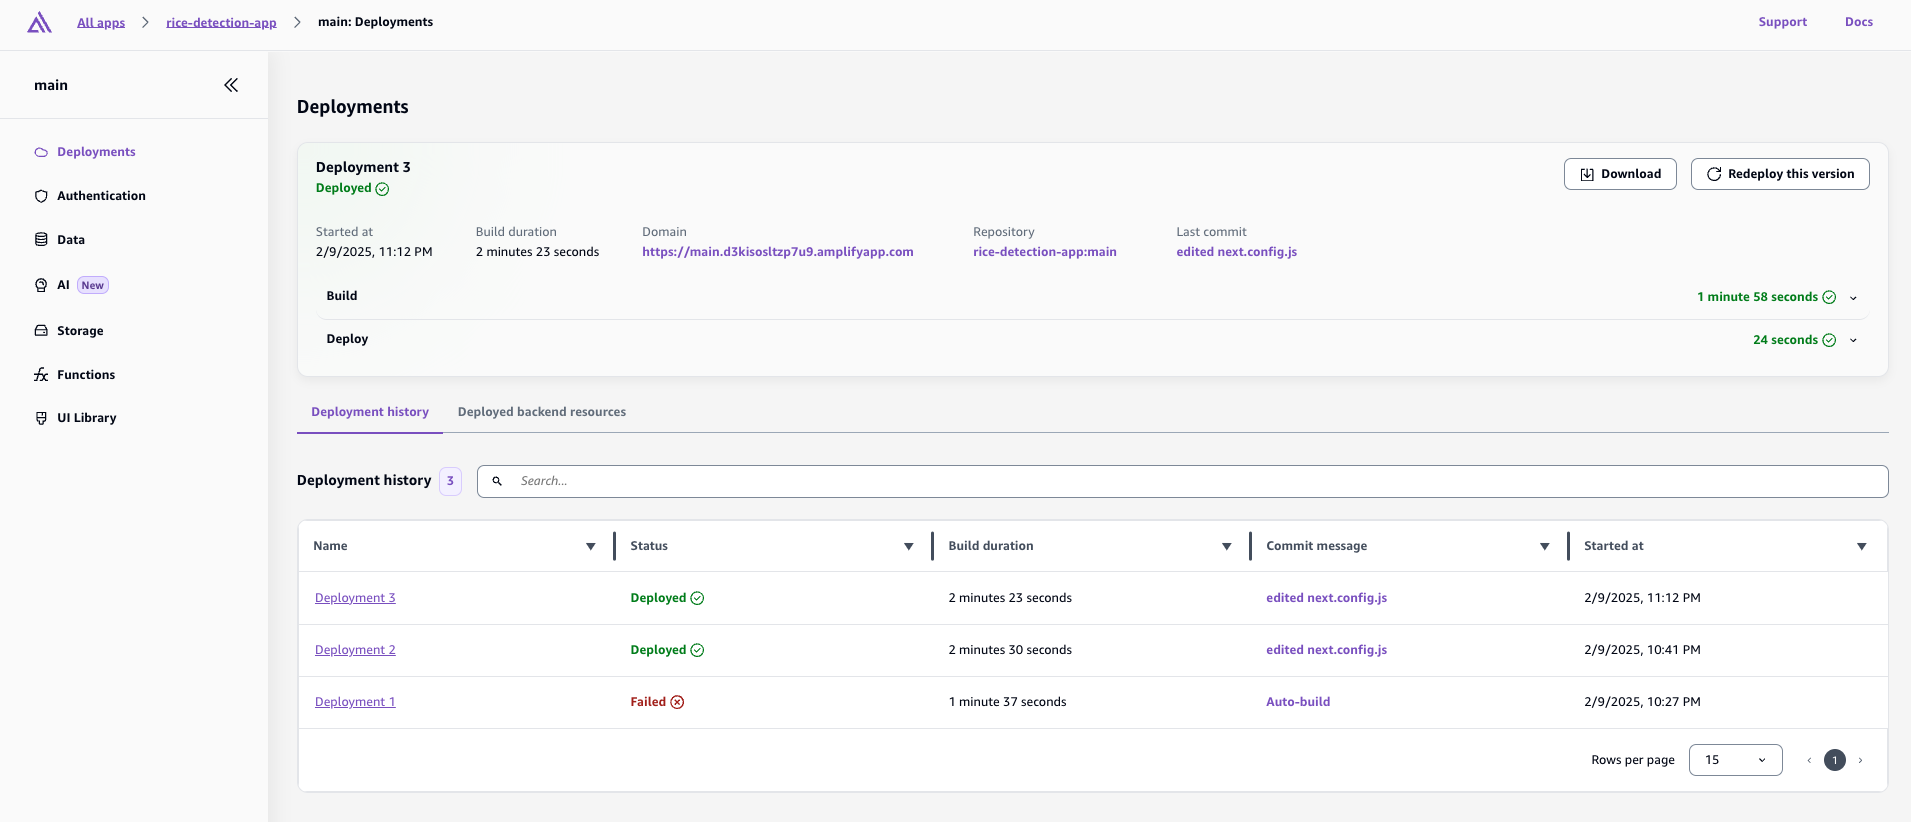
The deployment process includes:
- Provisioning build resources
- Cloning repository
- Running build commands
- Deploying to hosting environment
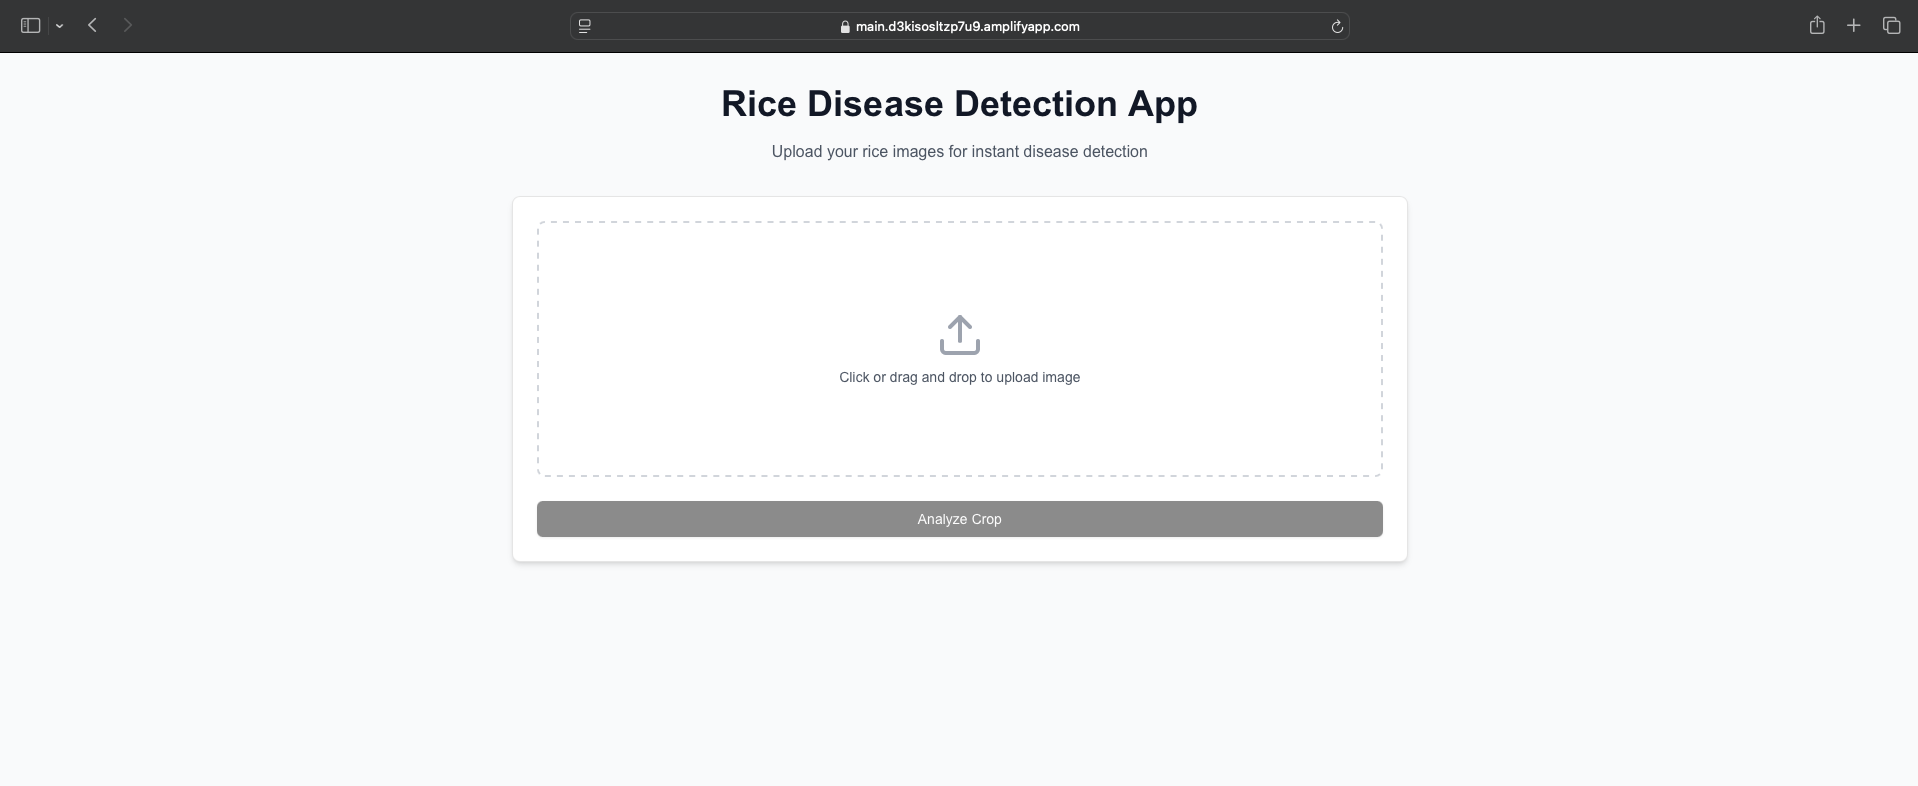
After successful deployment, you can now check the deployed url in the Amplify Console.
Challenges and Solutions
- Issue with Secrets in AWS Amplify
I initially planned to store AWS_ACCESS_KEY_ID and AWS_SECRET_ACCESS_KEY as Secrets, while keeping the rest as standard environment variables. However, Amplify failed to recognize the secrets and threw an error during build time:
!Failed to set up process.env.secrets.
However, adding all variables to the Environment Variable section in Amplify worked.
After doing this, Amplify started recognizing the variables and deployment was successful. I found it odd especially when it is adviced on the Amplify docs to use Secrets.
- AWS_ACCESS_KEY_ID Prefix Not Allowed in Environment Variables
When adding AWS_ACCESS_KEY_ID and AWS_SECRET_ACCESS_KEY in Amplify’s environment variables, I encountered an issue:
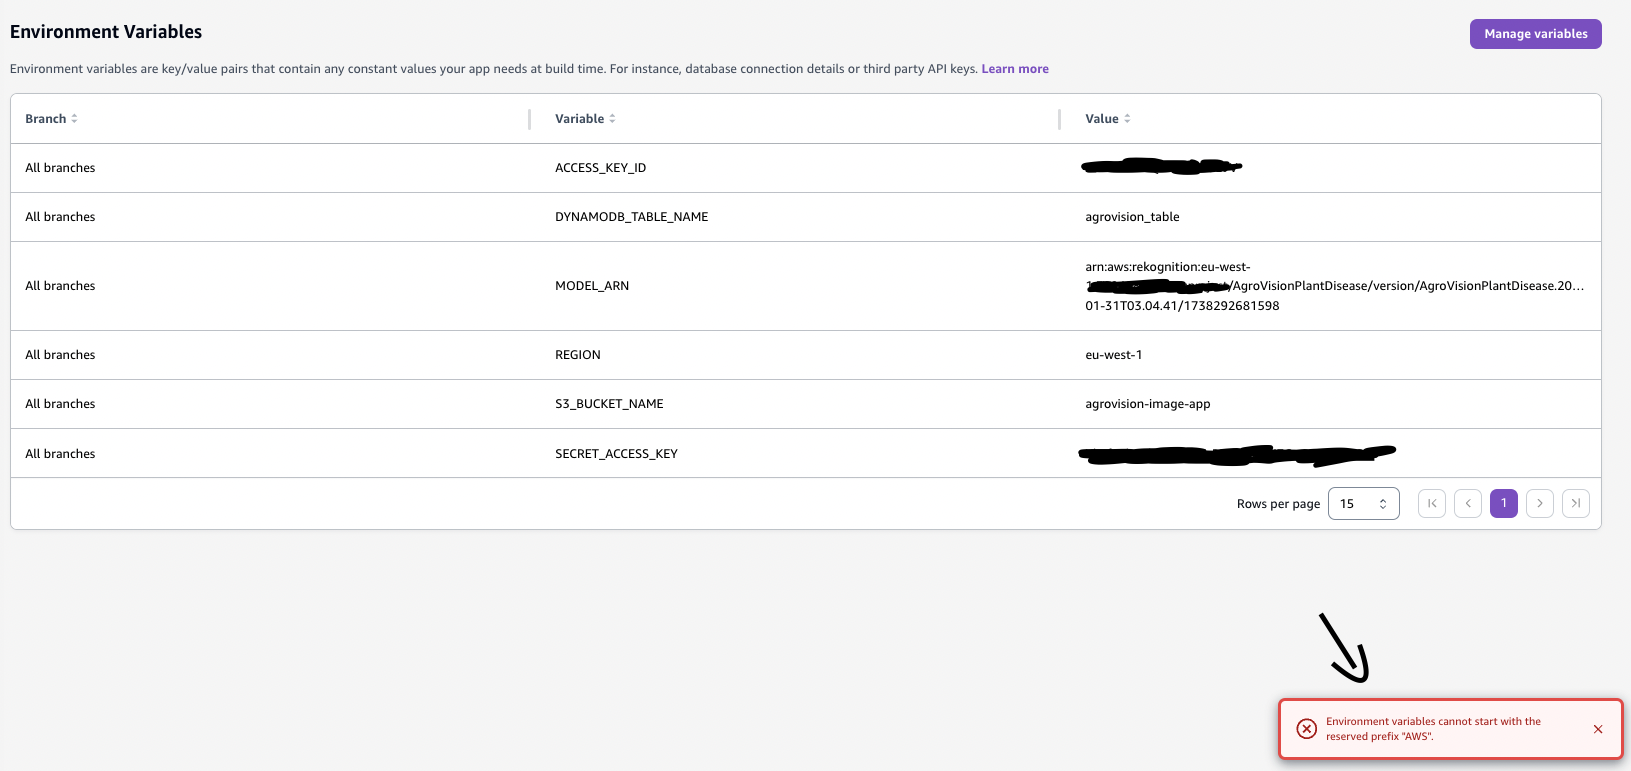
This is likely a security measure to prevent conflicts with AWS system variables.
Solution:
I renamed AWS_ACCESS_KEY_ID → ACCESS_KEY_ID.
I renamed AWS_SECRET_ACCESS_KEY → SECRET_ACCESS_KEY.
In my code, I updated the environment variable references accordingly:
Monitoring and Logs
-
Access build logs via CloudWatch:
- Navigate to the ‘hosting’ section in Amplify Console
- Select the ‘Monitoring’ tab
- Click ‘Hosting compute logs’
This will show the build logs via CloudWatch.
References and Resources
This is the end of the series. For more details on other components of the application, refer to the other guides on Lambda, S3, and Rekognition configuration.
